First of all, I am super jealous of people who are all creative and crafty! Sometimes I think I have a crafty creative person hiding inside of me pretending to be the most uncrafty person ever. Sometimes I do get really good ideas. However, after spending hours attempting to complete a simple craft that should only take ten minutes, it usually ends up looking like a giant Pinterest FAIL. I happen to LOVE Pinterest, and it really gets me motivated to attempt to be crafty, but like I said, rarely do I have projects actually turn out looking anywhere close to what they should, especially after I put my own twist on them. I'm actually super proud of this project though, so much in fact, that I'm not at all embarrassed to share it.
We finished our Christmas shopping early this year, before Thanksgiving even! I wanted to go ahead and get the gifts wrapped, but I wanted to do something unique for the tags. I had seen several Pinterest ideas using paint chip samples that looked super cute, and I figured that maybe I wouldn't be able to mess them up too badly.
Here's one of the places I got my ideas from:
DIY Paint Chip Gift Tags and here's another:
Paint Chip Gift Tags with Printable I combined ideas and added my own twist to them; I will add a simple materials list and steps at the end of this post for how I made them.
The first thing I had to do was convince my husband to
steal get 30 paint chip samples of a variety of colors: browns,
greens, reds, whites, grays. He
completed that task rather successfully, and I had a large stack of paint chip
samples to work with. I printed 4
outlines (a ginger bread man, a snowman, a Christmas tree, and a candy cane) onto card stock paper and cut them out.
I then traced the pattern on a paint chip sample and cut them out.
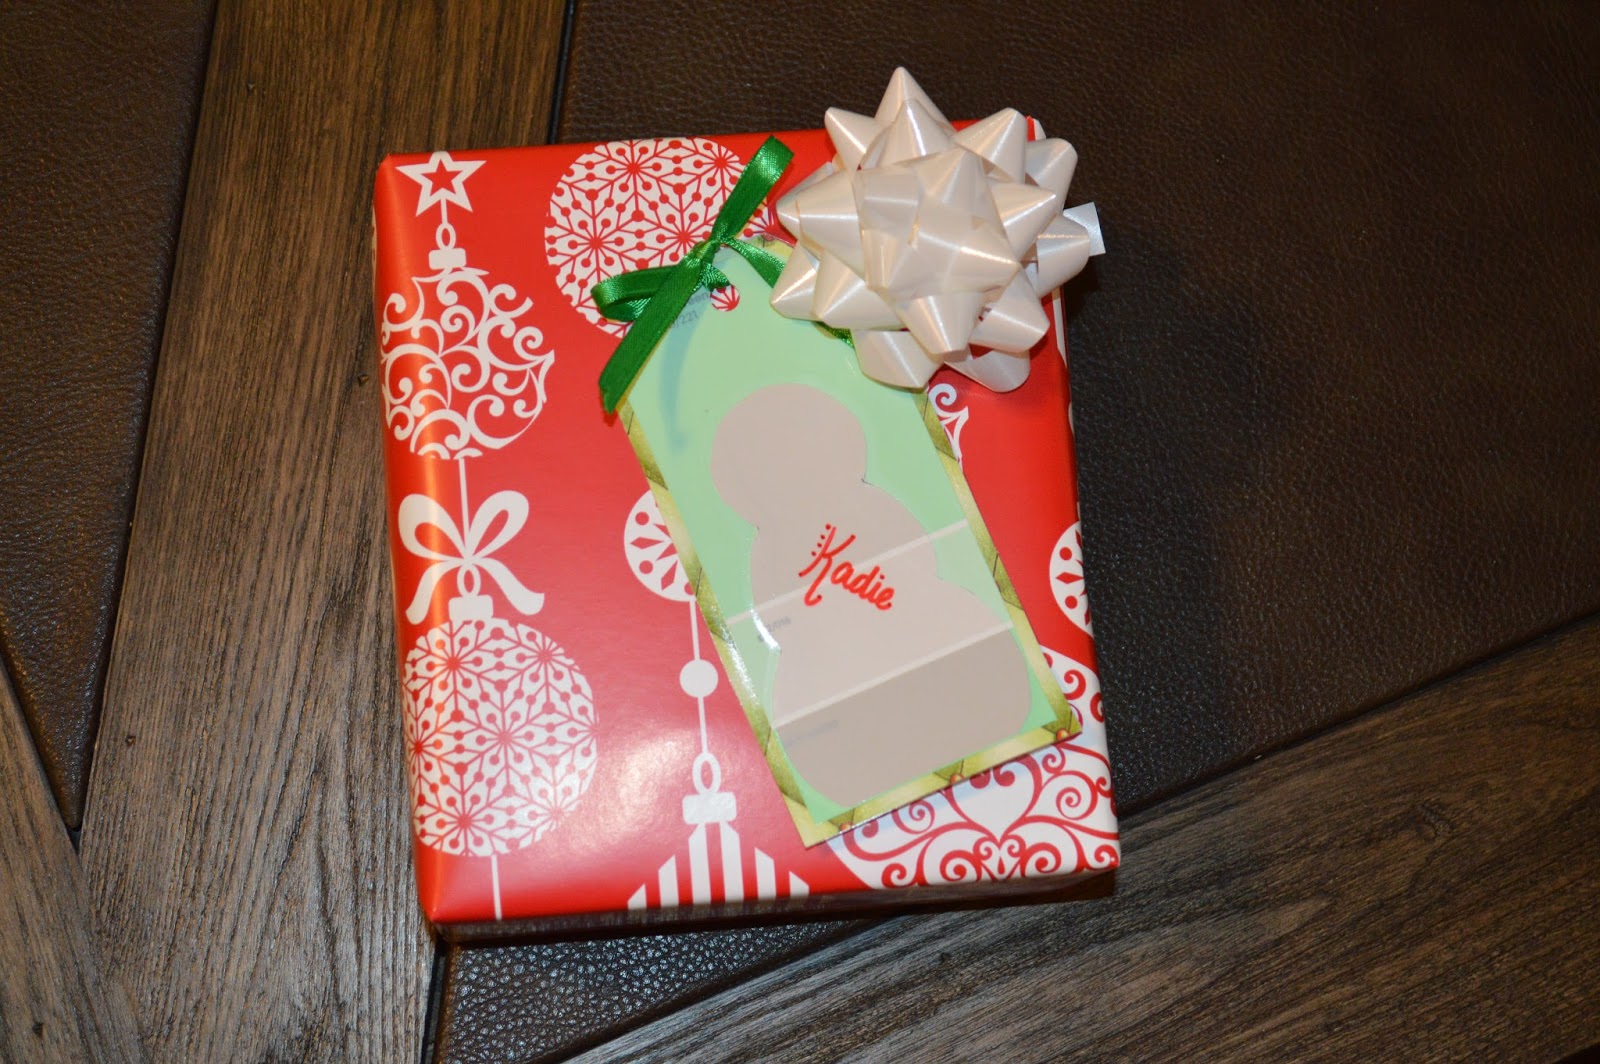
This is the part where I put my own creative twist on the project. I glued the cutout shapes onto other paint chip samples of contrasting colors; then I cut the second paint chip samples into tag shapes. After that I glued the tags onto a sheet of patterned scrapbook paper.
I added names to the tags (I also left 6 blank-not pictured) and cut the tags out from the scrapbook paper. At this point, I felt like I had put a lot of effort into these tags and another idea struck me. This next step would be completely optional. I had some laminate sheets left over from another project, so I laminated the tags. This made them durable and reusable, as long as they do not get thrown away. (I may have to be the gift tag police this year to make sure they do not get thrown out or lost!) After cutting the laminate out, I hole punched the tags and the project was complete.
I wrapped the gifts, added a ribbon to the tags and attached them! I was especially glad that I had made a few extras and left them blank. Since I had laminated them, I wrote the name on the tag with an erasable marker so that I can simply erase it and use it again next year. I'm pretty happy with how they turned out!
With love,
L
--------------------------------------------------------------------------------------------------------------------------
Materials:
-variety of paint chip samples (reds, greens, browns, whites, grays)
-card stock
-variety of patterned scrapbook paper
-scissors
-paper trimmer
-glue
-hole punch
-ribbon
Steps:
1. Print outlines (ginger bread man, snowman, Christmas tree, candy cane or stocking) on card stock paper; cut out.
2. Trace outlines onto paint chip samples and cut out.
3. Glue shapes onto second paint chip sample and use paper trimmer to cut into tag shape.
4. Glue tag onto patterned scrapbook paper; use paper trimmer to cut into an outlined tag shape.
5. Laminate tags. (Optional)
6. Hole punch top of tag.
7. Add ribbon and attach to gift.


No comments:
Post a Comment